Developing APIs (Application Programming Interfaces) have evolved through the years as the world transitions from desktop applications to web apps that are conveniently accessible online. Roy Fieldings’ dissertation – Architectural Styles and the Design of Network-based Software Architectures in 2000 paved the way for the modern APIs that we enjoy today. Since then, various companies such as Salesforce and Amazon followed suit and the rest is history.
There are different types of APIs from SOAP, to REST to GraphQL to WebSockets to gRPC and to yet-another-API technology that will be unveiled in the future. Microsoft originally designed the Simple Object Access Protocol (SOAP) which uses the eXtensible Markup Language (XML) that lets you define and store data in a shareable manner. On the other hand, REST (REpresentational State Transfer) is a technology that’s generally preferred over other similar API types which use less bandwidth which makes it more suitable for efficient public Internet usage. GraphQL is basically a query language for web APIs which also acts as a runtime for fulfilling those queries with your existing dataset and WebSockets provides a two-way interactive communication session between the user’s browser and a server.
In this article, I’ll share the steps on how to create a Real-Time API in AWS AppSync that leverages WebSocket technology. Let’s get started!
Creating your WebSocket API with AWS AppSync
First, login to your AWS account and navigate to the AWS AppSync console:
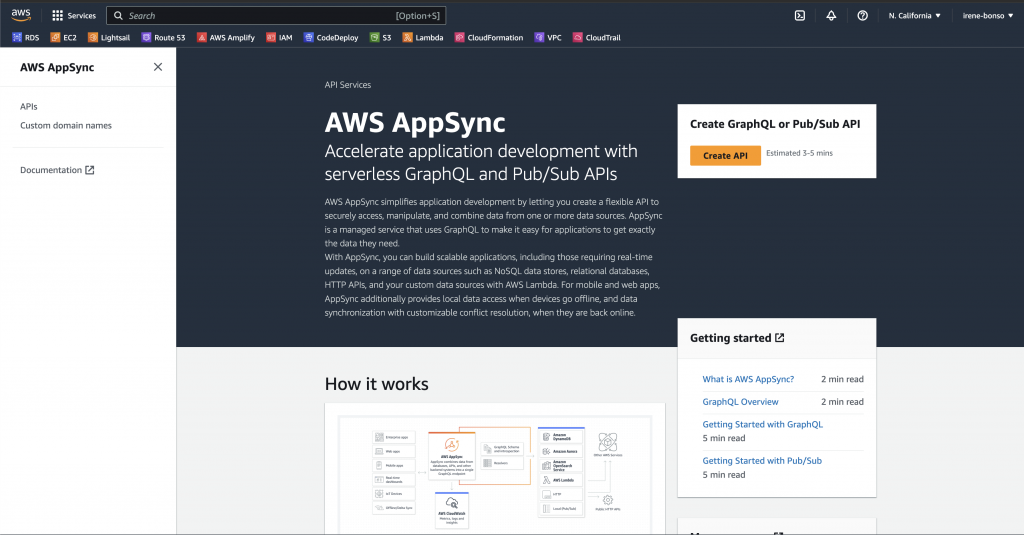
On the upper-right hand corner, you will see the Create GraphQL or Pub/Sub API section
Click the Create API button
In the “Select API type” section, select the GraphQL APIs.
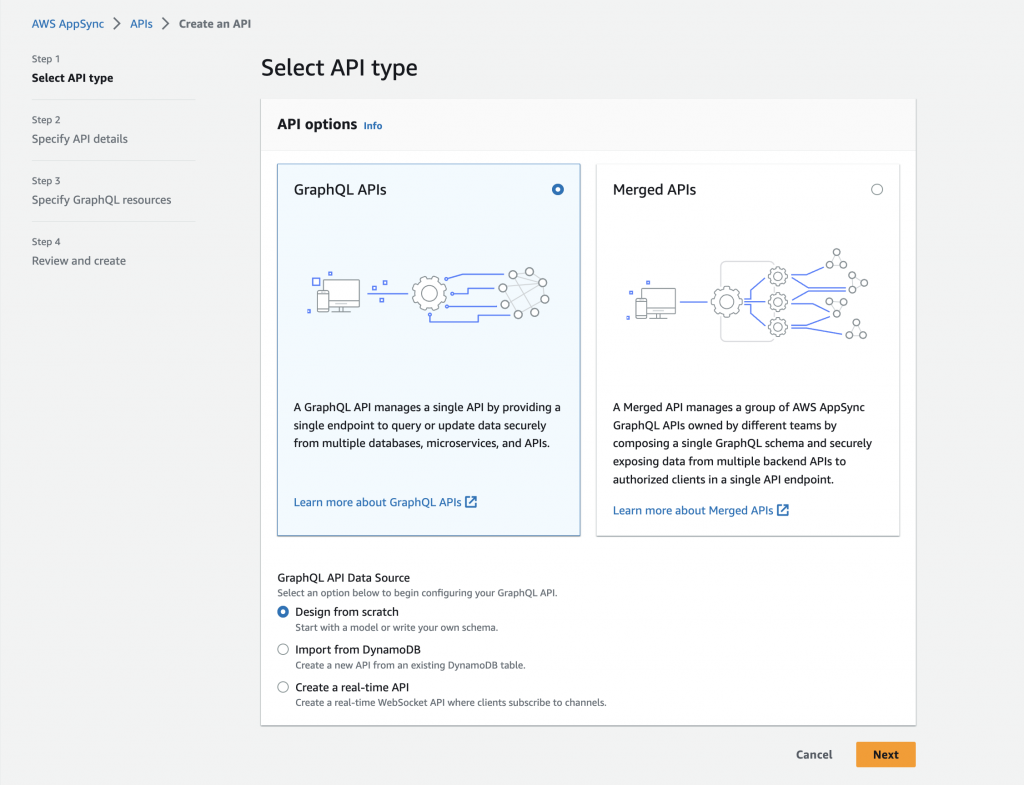
On the GraphQL API Data Source, select “Create a real-time API”

hit “Next”
In Step 2: Specify the API details by filling out the API name and contact details.
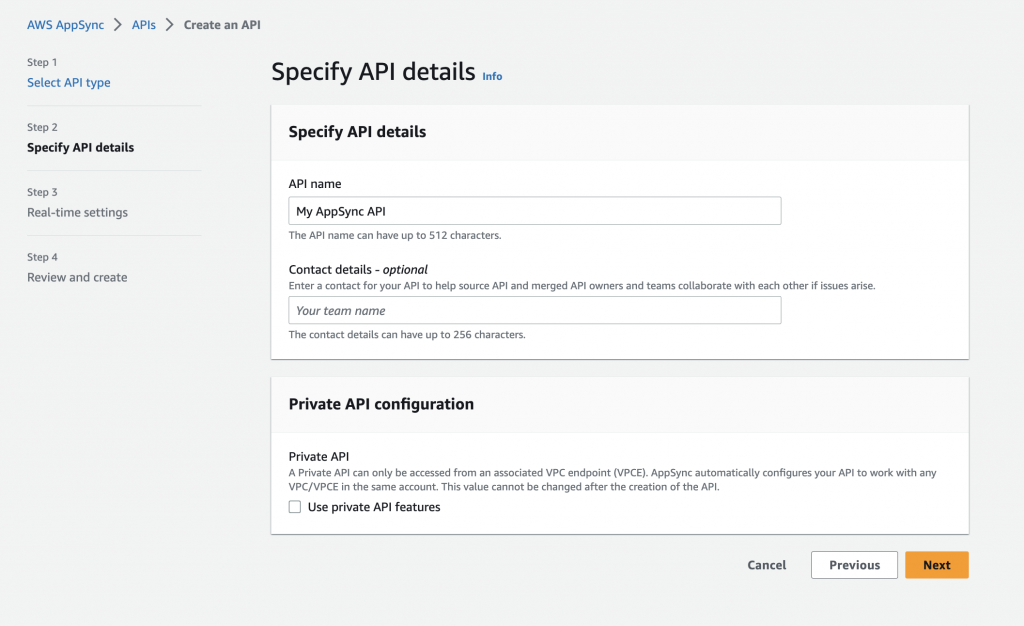
You can also optionally select the Private API option. A Private API can only be accessed from an associated VPC endpoint (VPCE). The AWS AppSync service will automatically configure your API to work with any VPC/VPCE in the same account and this value cannot be changed after the creation of the API.
Click the Next button.
On the Step 3, select the GraphQL Real-Time Settings.
This Pub/Sub only configuration is preferred if your application requires a simple WebSockets API where clients listen to a specific channel or topic. You can check this tickbox to automatically generate a fully functional pub/sub API powered by the AWS AppSync’s serverless WebSockets engine.
If you want, you can also uncheck this box and configure from scratch a GraphQL API that leverages subscription operations to support more advanced real-time use cases; but take note that by doing so, your project entails additional overhead.
Tick the button for the “Create a simple pub/sub API powered by serverless WebSockets”
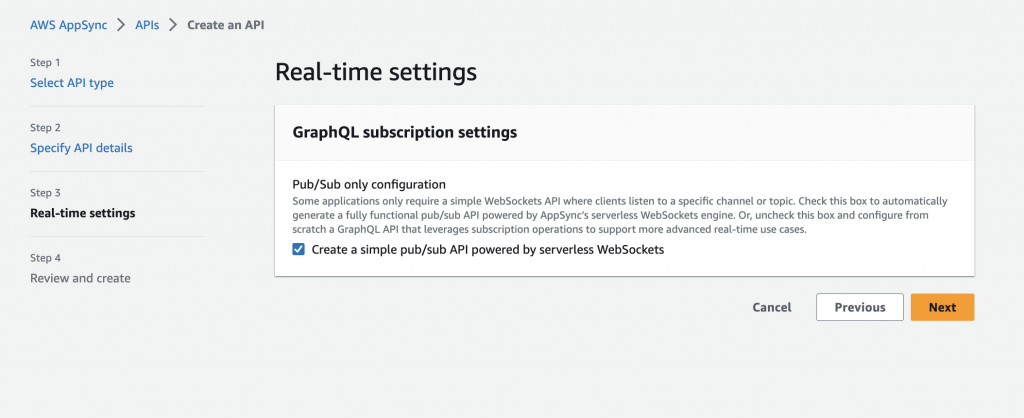
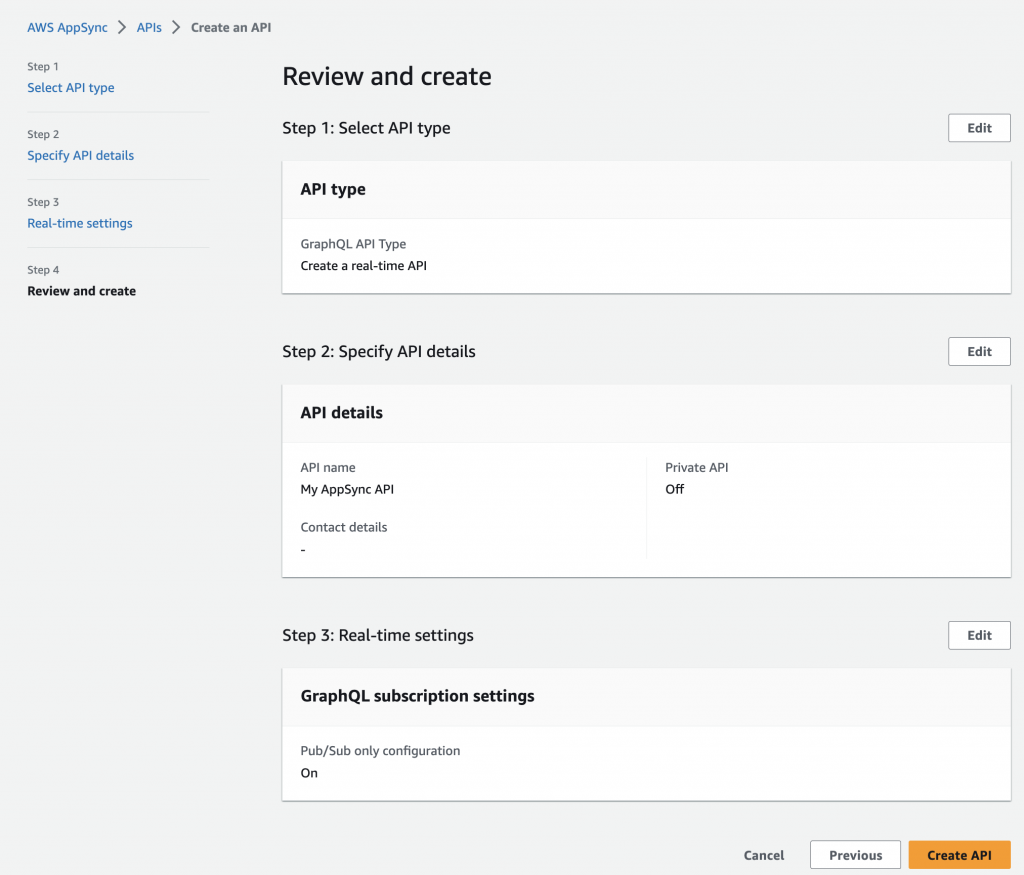
Click the Next button to review your project.
If all information is correct, click the “Create API”
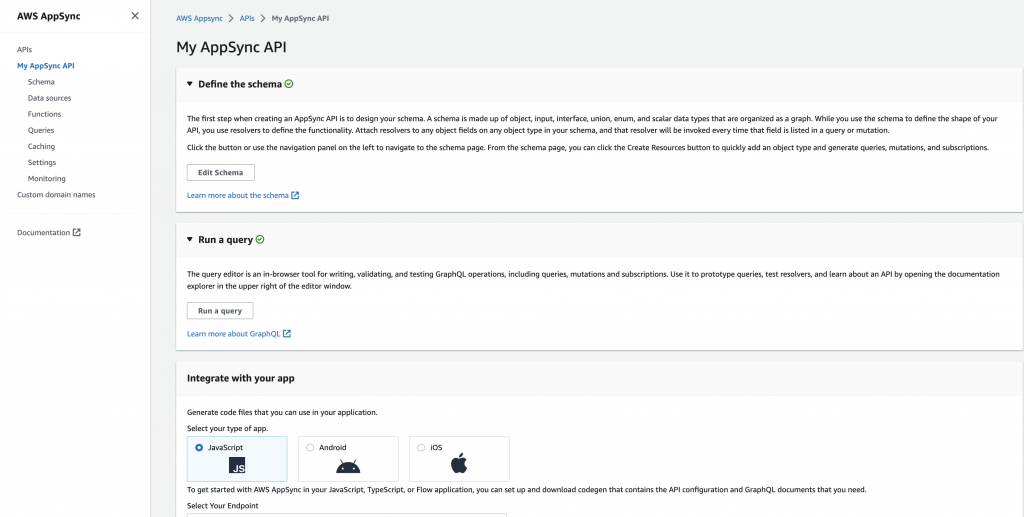
Once done, you’ll be able to see your WebSocket API here:
Testing your WebSocket API in AWS AppSync
On the right-hand panel, click the Queries
In this part, you can invoke GraphQL queries:
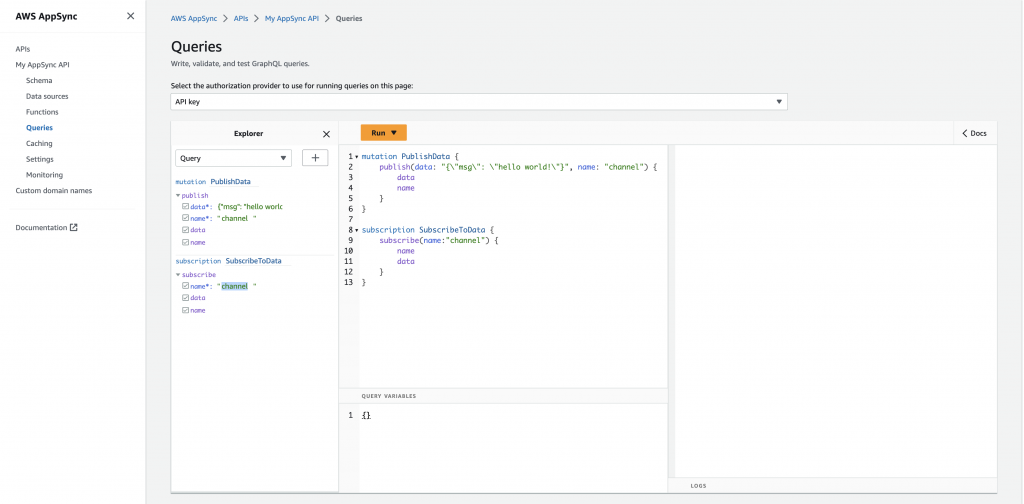
Click the “Run” button to execute your GraphQL query:
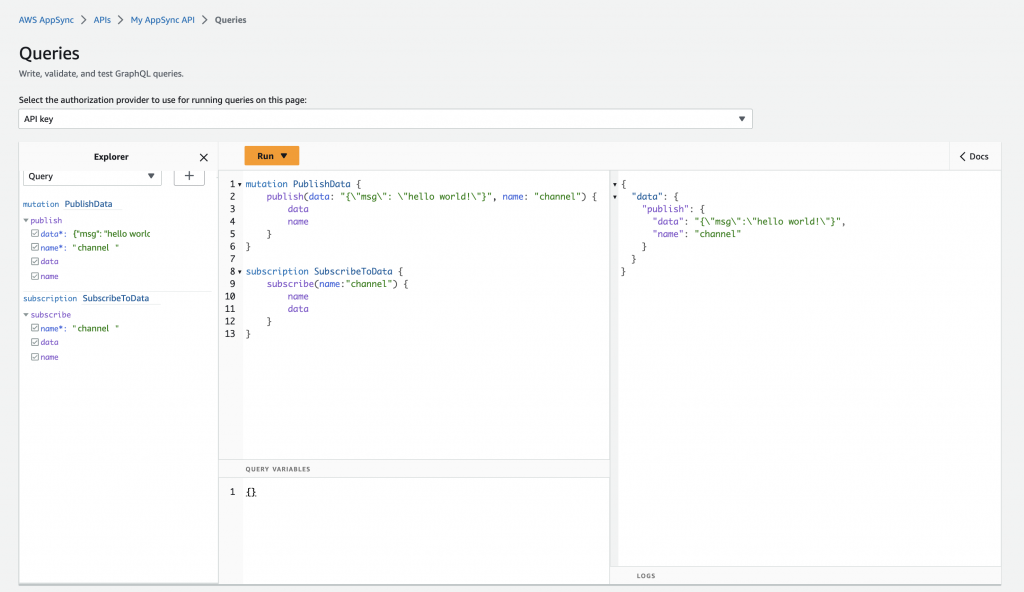
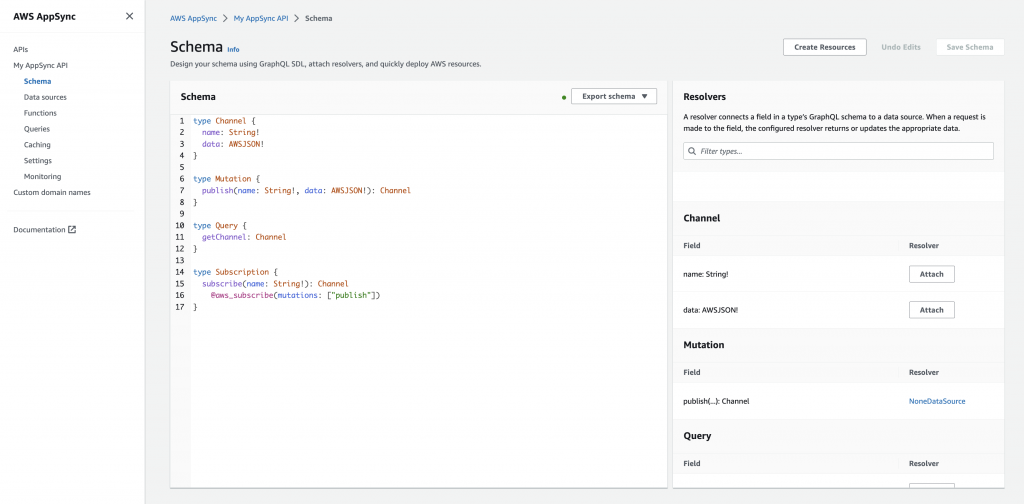
You can also view the Schema of your WebSocket API
To actually use your WebSocket API, you can create a client that subscribes to your endpoint.

Sample code reference:
import './App.css'
import React, { useEffect, useState } from 'react'
import Amplify from '@aws-amplify/core'
import * as gen from './generated'

Amplify.configure(gen.config)

function App() {
    const [send, setSend] = useState('')
    const [received, setReceived] = useState(null)

    //Define the channel name here
    let channel = 'robots'

    //Publish data to subscribed clients
    async function handleSubmit(evt) {
        evt.preventDefault()
        evt.stopPropagation()
        await gen.publish(channel, send)
        setSend('Enter valid JSON here... (use quotes for keys and values)')
    }

    useEffect(() => {
        //Subscribe via WebSockets
        const subscription = gen.subscribe(channel, ({ data }) => setReceived(data))
        return () => subscription.unsubscribe()
    }, [channel])

    //Display pushed data on browser
    return (
        <div className="App">
            <header className="App-header">
                <p>Send/Push JSON to channel "{channel}"...</p>
                <form onSubmit={handleSubmit}>
                    <textarea rows="5" cols="60" name="description" onChange={(e) => setSend(e.target.value)}>
                        Enter valid JSON here... (use quotes for keys and values)
                    </textarea>
                    <br />
                    <input type="submit" value="Submit" />
                </form>
                <p>Subscribed/Listening to channel "{channel}"...</p>
                <pre>{JSON.stringify(JSON.parse(received), null, 2)}</pre>
            </header>
        </div>
    )
}

export default App