We all know that “serverless” application doesn’t mean there’s no server running at all. It just means that your application is running on an AWS-managed server for a set amount of time, in which you don’t manage the server resources at all. Thus, it entails “less” server management. In this article, I will share the steps to create a Lambda function with a Function URL that will allow you to easily invoke your serverless apps.
What is a Lambda Function URL?
AWS Lambda is actually powered by an open-source virtualization technology called “Firecracker” which acts as a Virtual Machine Monitor (VMM) that runs ephemeral microVMs that power your functions. The issue with this is that, you usually need to have another endpoint to invoke your functions such as using API Gateway or AWS AppSync.
The good thing is that it has a new feature called AWS Lambda Function URL. This is basically a dedicated HTTP(S) endpoint for your Lambda function where you can create and configure through the Lambda console or the Lambda API. AWS Lambda automatically generates a unique URL endpoint for you when you create a function URL and once done, its URL endpoint never changes.
Lambda Function URL endpoints have the following format:
https://<url-id>.lambda-url.<region>.on.awsFunction URLs in AWS Lambda are dual stack-enabled, supporting IPv4 and IPv6 so you configure a function URL for your function, you can invoke your function through its HTTP(S) endpoint via a web browser, curl, Postman, or any HTTP client.
Steps in Creating a Function URL in AWS Lambda
First, login to your AWS account and choose to AWS Region where you want to launch your Lambda function. You can go to the top-right hand corner of the AWS Management Console, and select the particular region that I want.
Let’s choose the South Korea region for this example:
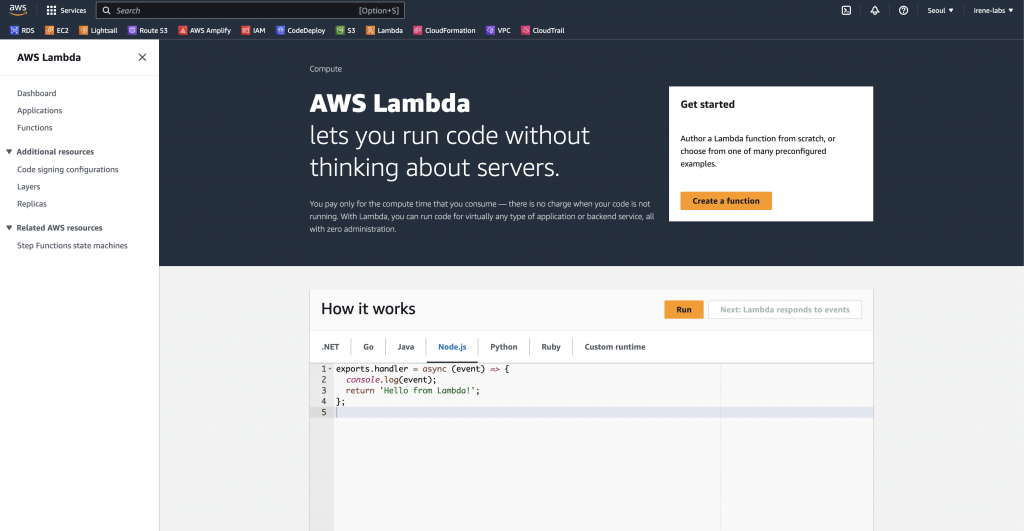
The next step is to actually go to the AWS Lambda console.
There are many ways on how you can do this. The first one is to click the AWS Lambda icon in your AWS Dashboard as seen here. If you don’t see it, then that means you haven’t opened the Lambda console in the past.
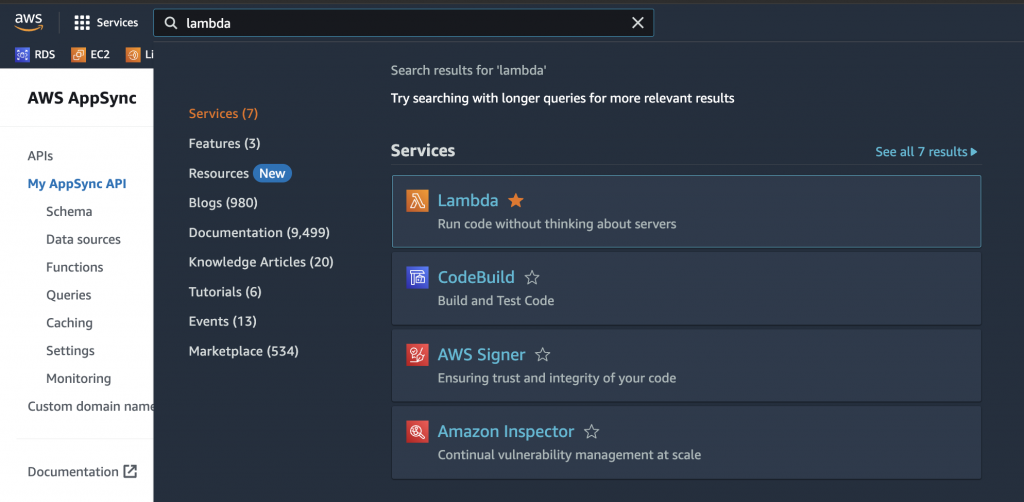
You can also search for the word Lambda in the unified search bar like this and click the Lambda icon.
The other step is to go to the top left corner of the screen and click the Services menu icon. From here, navigate to the COMPUTE menu and you will find the AWS Lambda link.
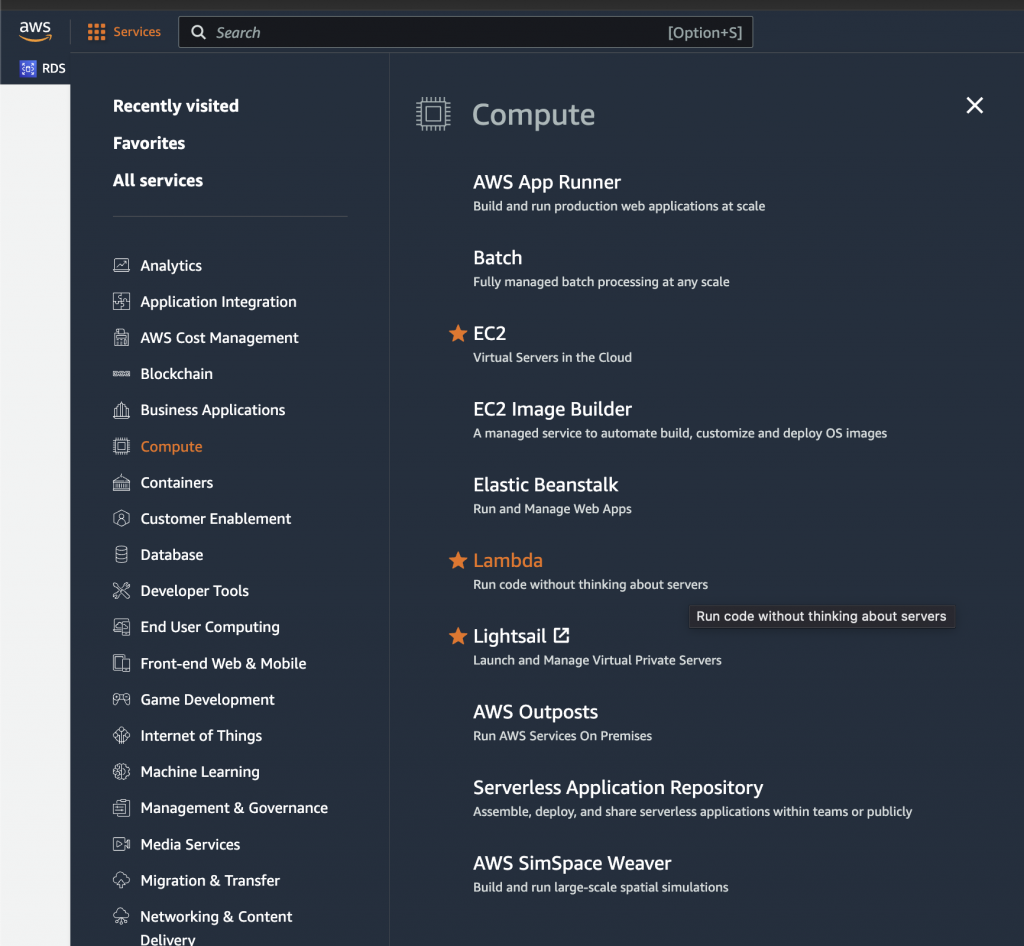
The star that you see beside this icon will allow you to add this particular service on your Favorites list. This list will add a new menu in your console for easy access as you can see right here.
Let’s now go to the Lambda console by clicking this link.
This screen you see here is the AWS Lambda management console. I currently have one existing Lambda function here but let’s create a new one by clicking this Create Function button.
We have 3 different ways to create a Lambda function. The first one is to Author it from Scratch, the second is to use a Blueprint and the last one is to use a Container Image:

Let’s begin by checking out the first option. In here, you will see different fields to fill out like the Function name, Runtime, the Architecture, Permissions, Execution Role and other details of your Lambda function.
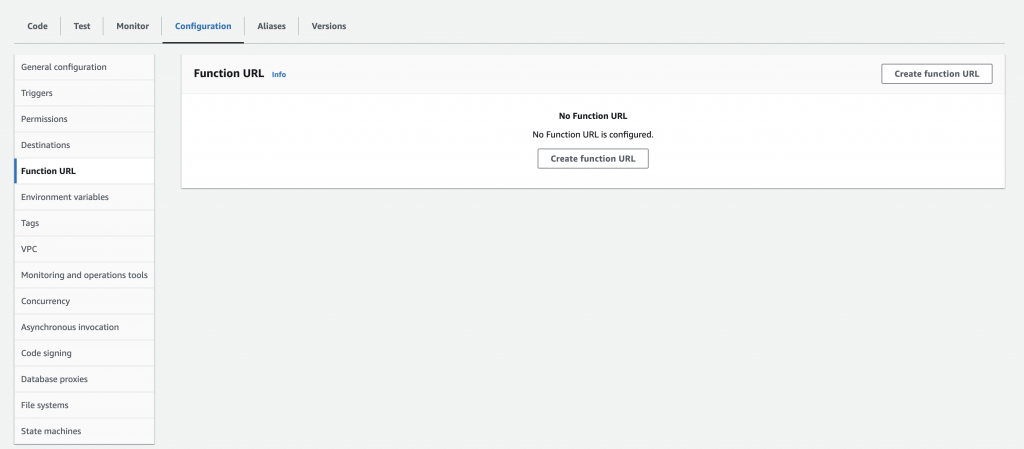
It also comes with Advanced Settings that you can use. You can enable Code Signing, function URL, Tags and Amazon VPC access.
These fields are daunting at first, especially if you are quite new in AWS. You can use click this INFO tooltip right here that will show the relevant information for each particular field.
For instance, you can click this INFO tooltip to know more about the Runtime field or Architecture field. This will help you decide the right settings for your function.
The Runtime field presents the different programming languages that you can choose for your function like Python, Node.js, Java and others.
The Architecture field lets selects you the Instruction Set architecture that will be used by the Lambda internal server to run your program.
Under the Permissions section, you create a new role with basic Lambda permissions, use an existing role right here or create a new role from AWS policy templates.
The Advanced Settings have several features that you can turn on based on your requirements. In case you are not familiar with any of these features, you can always click the INFO tooltip just as I mentioned a while ago.
Let’s now hop on to this Use a Blueprint option.
This one provides a blueprint or a ready-to-use template that we can immediately use like getting an S3 object, a hello world function, Booking a trip with Amazon Lex, getting a Batch job from AWS Batch, processing a datastream from Kinesis and many more.
For now, let’s choose a Hello World function blueprint and name it as MindaNation function.

We will set an existing role that I have prepared in beforehand. This function has a NodeJS runtime in an X86-64 architecture.
I’ll choose this Lambda Basic Execution role and scroll down below to see the sample code.
Click the Create Function button and that’s it!
You now have your very own AWS Lambda function!
It has a Function Overview here and different tabs down below.
We will further discuss how to change, manage and optimize your existing Lambda function our succeeding lectures.